Bathroom exhaust fan installation is one of the most important upgrades for maintaining a clean, healthy, and comfortable bathroom environment. A properly installed exhaust fan removes excess moisture, improves airflow, and helps prevent long-term damage caused by trapped humidity. In modern homes, bathrooms generate a large amount of steam from showers and hot water use, and without proper ventilation, that moisture can quickly lead to problems.
Poor airflow often causes fogged mirrors, damp walls, peeling paint, and unpleasant odors. Over time, constant moisture buildup may also lead to mold and mildew growth, especially around ceilings, grout lines, and corners. These issues not only affect the appearance of the bathroom but can also create unhealthy indoor air conditions.
A well-planned bathroom exhaust fan installation helps solve these problems by directing humid air outside the home. Before starting the project, homeowners should understand the importance of proper fan placement, exterior venting, safe electrical wiring, and selecting the correct fan size for the space. Whether replacing an old fan or installing one where no fan currently exists, careful planning makes the installation smoother and more effective.
Quick Comparison Table
| Installation Type | Best For | Difficulty Level | Average Cost | Main Benefit |
| Replacing Existing Fan | Older bathrooms with current venting | Easy to Moderate | Lower | Faster installation |
| New Ceiling Installation | Bathrooms without any fan | Moderate to Hard | Higher | Better long-term ventilation |
| Attic Vent Installation | Homes with attic access | Moderate | Medium to High | Easier duct routing |
| Window Exhaust Fan | Small bathrooms or apartments | Easy | Lower | No ceiling duct required |
| Professional Installation | Complex wiring or roof work | Easy for homeowner | Highest | Safe and code-compliant setup |
Why a Bathroom Exhaust Fan Is Important
Bathrooms are naturally humid spaces, and moisture can build up quickly after showers or baths. Without proper ventilation, that humid air stays trapped inside the room and spreads into nearby walls and ceilings. Bathroom exhaust fan installation helps control this moisture by continuously removing damp air and replacing it with fresher airflow.
Reducing humidity is important because excessive moisture creates the perfect environment for mold and mildew. Mold often develops behind paint, around ceiling corners, and inside drywall where it may go unnoticed until damage becomes severe. A quality exhaust fan helps prevent these conditions and protects the overall structure of the bathroom.
Good ventilation also improves indoor comfort. Bathrooms without proper airflow tend to hold odors longer, making the room feel stale and uncomfortable. An exhaust fan quickly removes odors while improving overall air quality inside the home.
Modern building standards also recognize the importance of bathroom ventilation. Many local codes now require mechanical ventilation in bathrooms that lack windows or natural airflow. Installing an exhaust fan is often considered a necessary part of maintaining a safe and efficient home.
Choosing The Right Bathroom Exhaust Fan For Your Space
Selecting the right fan is one of the most important parts of bathroom exhaust fan installation. A fan that is too small may struggle to remove moisture effectively, while an oversized unit can create unnecessary noise and energy use.
Most bathroom fans are rated by CFM, which stands for cubic feet per minute. This rating measures how much air the fan can move. Larger bathrooms usually require higher CFM ratings to handle increased moisture levels. As a general guideline, many homeowners choose at least 1 CFM per square foot of bathroom space.
Noise level is another factor to consider. Some older fans are loud and disruptive, while newer models operate quietly. Fans with lower sone ratings are typically quieter and more comfortable for daily use.
Homeowners can also choose between ceiling-mounted and wall-mounted units depending on the bathroom layout. Ceiling-mounted fans are more common because they efficiently pull steam upward, especially near showers and tubs. Wall-mounted fans may work better in rooms with limited attic access.
Modern features such as humidity sensors, built-in lighting, timers, and energy-efficient motors can improve convenience and performance. The best bathroom exhaust fan installation setup depends on bathroom size, ceiling structure, and the amount of moisture regularly produced in the room.
Planning The Installation Before Cutting Into The Ceiling
Proper planning is essential before beginning any installation work. One of the first things homeowners should check is whether there is attic access above the bathroom ceiling. Easy attic access can simplify duct routing, wiring, and mounting.
It is also important to locate ceiling joists before cutting any openings. Using a stud finder helps avoid structural framing and reduces the risk of damaging nearby materials. The fan should ideally be positioned close to the shower or bathtub where steam collects most heavily.
Vent routing is another critical consideration. The ductwork should always lead directly outside through a wall, roof, or soffit vent. The shortest and straightest duct path usually provides the best airflow performance. Venting into attics or crawlspaces should never be done because trapped moisture can cause wood rot, insulation damage, and mold growth.
Homeowners should also review local building and electrical codes before starting the project. Some areas may require permits or inspections, especially when new wiring or roof venting is involved.
Essential Tools And Materials Needed For Installation
A successful bathroom exhaust fan installation requires the right tools and materials. Many homeowners purchase a bathroom exhaust fan installation kit that includes the fan housing, mounting hardware, and wiring connections.
Flexible insulated ductwork is commonly used to move humid air outside the home. Insulated ducts help reduce condensation inside attic spaces, especially during colder weather. An exterior vent cap is also necessary to allow airflow outside while preventing rain, pests, and debris from entering the duct.
Bathroom exhaust fan mounting brackets help secure the housing firmly between ceiling joists. Other common materials include electrical cable, wire nuts, cable clamps, foil HVAC tape, and waterproof caulking.
Basic tools often include a keyhole saw, drywall saw, drill, measuring tape, utility knife, and safety glasses. Having all materials prepared in advance can make the installation process faster and safer.
Step-by-Step Bathroom Exhaust Fan Installation Process
Preparing the Work Area Safely
Before beginning any electrical work, the power should be turned off at the main breaker panel. This reduces the risk of electric shock during wiring installation. Protective eyewear and gloves should also be used when cutting drywall or working inside attic spaces.
Cutting the Ceiling Opening
The dimensions of the fan housing should be traced carefully onto the ceiling. After checking for joists and hidden wiring, the opening can be cut using a drywall saw or keyhole saw. Accurate cutting helps ensure a secure fit for the housing.
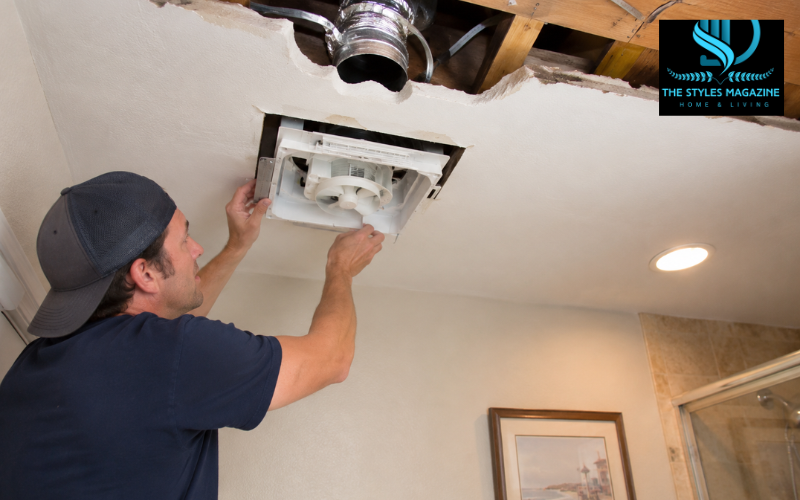
Installing the Fan Housing
The fan housing is placed into the ceiling opening and attached to nearby joists using mounting brackets or screws provided by the manufacturer. A stable installation helps reduce vibration and noise during operation.
Routing Electrical Wiring
Electrical cable is routed from the wall switch to the fan housing. In some cases, existing wiring from an older fan may already be available. New installations may require additional electrical work depending on the home’s layout.
Connecting the Fan Wiring Correctly
Inside the junction box, matching wire colors are connected together using wire nuts. Typically, black connects to black, white connects to white, and the grounding wire attaches to the grounding screw. All wiring should remain secure and fully enclosed.
Attaching and Sealing the Ductwork
Flexible ductwork is attached to the fan’s exhaust port and secured tightly. HVAC foil tape helps seal the connection and prevent air leaks. Keeping the duct path straight improves airflow efficiency.
Installing the Exterior Vent Cap
The duct exits through a roof, soffit, or exterior wall where the vent cap is installed. Waterproof caulking is applied around the exterior vent to protect against water intrusion and weather damage.
Mounting the Fan Grille and Testing Airflow
After restoring power, the grille is attached to the ceiling. The fan should then be tested to confirm proper airflow and quiet operation. Strong airflow indicates the installation was completed correctly.
How to Install a Bathroom Fan Where One Does Not Exist
Installing a fan in a bathroom that never had one before can be more challenging than replacing an old unit. A completely new vent path must be created, which often involves cutting through drywall, routing ductwork, and adding exterior venting.
New electrical wiring may also need to run from the wall switch to the ceiling area. This process can become difficult in finished homes where access inside walls is limited.
Some homeowners may feel comfortable handling basic installation work themselves, but complex wiring and roof venting often require professional assistance. Hiring an electrician or contractor may help ensure the installation meets local code requirements safely.
How to Install Bathroom Exhaust Fan in Attic Spaces
Bathrooms with attic access often provide more flexibility during installation. However, attic installations require careful ventilation planning to prevent moisture problems.
Condensation can develop inside ductwork when warm bathroom air meets cold attic temperatures. Using insulated ducting helps reduce this risk and improves airflow performance during winter months.
The duct should remain as short and straight as possible while leading directly to an outdoor vent. Roof vents and soffit vents are common choices, but each must be sealed properly to prevent leaks and weather damage.
Safe attic access is also important. Homeowners should avoid stepping directly on drywall ceilings and instead walk only on secure framing or support boards.
How to Install Exhaust Fan in Bathroom Window Areas
Some bathrooms use window-mounted exhaust fans when ceiling venting is difficult or impossible. These fans fit into window openings and remove humid air directly outdoors.
Window-mounted units can work well in smaller bathrooms, but they may not provide the same airflow performance as ceiling-mounted systems. Outdoor weather conditions and window size limitations can also affect efficiency.
Compared to ceiling fans, window units may allow more outside noise and temperature changes into the room. Proper sealing around the installation area is important to reduce drafts and moisture leaks.
Although less common today, window-mounted fans can still provide useful ventilation in certain situations where traditional ductwork is not practical.
Common Bathroom Exhaust Fan Installation Mistakes to Avoid
One of the most serious mistakes during bathroom exhaust fan installation is venting moist air into the attic instead of outdoors. This trapped moisture can lead to mold growth, wood damage, and insulation problems.
Long or twisted duct runs are another common issue. Excessive bends reduce airflow efficiency and make the fan work harder. Straight duct paths with minimal turns usually provide better results.
Choosing the wrong fan size can also affect performance. Small fans may fail to remove moisture effectively, while oversized units may waste energy and create unnecessary noise.
Poor sealing around duct connections and exterior vents can allow air leaks and moisture intrusion. Electrical safety mistakes, such as improper grounding or exposed wiring, should also be avoided at all times.
Bathroom Exhaust Fan Installation Cost Breakdown
Bathroom exhaust fan installation cost can vary depending on the type of project and the complexity of the work involved. Replacing an existing fan is generally less expensive because wiring and ductwork may already be in place.
New installations usually cost more because they require additional electrical work, ceiling modifications, and exterior venting. Labor costs may also increase if roof access or attic work is difficult.
The price of the fan itself can vary widely based on features such as quiet operation, humidity sensors, lighting, and energy efficiency. Homeowners should also consider costs for duct materials, vent caps, electrical supplies, and possible permit fees.
Overall project pricing depends on bathroom size, installation difficulty, and local labor rates.
DIY Installation vs Hiring a Professional
Some homeowners choose DIY bathroom exhaust fan installation to save money and handle basic replacement projects themselves. Replacing an existing fan with similar wiring and duct placement is often manageable for experienced DIY users.
However, certain situations are better handled by professionals. Installing new electrical circuits, cutting roof openings, or modifying structural framing may require specialized knowledge and tools.
Improper roof venting can lead to leaks, while unsafe wiring may create fire hazards or code violations. Professional electricians and contractors can help ensure the installation is safe, efficient, and fully compliant with local regulations.
Homeowners searching for bathroom exhaust fan installation near me services should compare experience, licensing, and customer reviews before hiring a contractor.
Maintenance Tips After Installation
Regular maintenance helps keep bathroom exhaust fans operating efficiently for many years. Dust and lint can collect on the fan grille and blades over time, reducing airflow performance. Cleaning these parts every few months helps maintain proper ventilation.
Homeowners should also inspect duct connections occasionally to ensure there are no loose sections or air leaks. Weak airflow, excess humidity, or unusual noises may indicate that the fan is not venting correctly.
In many homes, bathroom exhaust fans should be inspected at least once a year to confirm proper operation. Replacing worn motors or damaged ductwork early can prevent larger ventilation problems later.
Conclusion
Bathroom exhaust fan installation plays a major role in protecting bathrooms from excess moisture, mold growth, and poor air circulation. A properly installed fan improves indoor comfort, supports healthier air quality, and helps preserve walls, ceilings, and paint from long-term moisture damage.
Safe venting practices, correct fan sizing, and proper duct routing are all important parts of a successful installation. Whether homeowners choose a DIY approach or hire a professional, careful planning can make the project more effective and reliable.
By selecting the right ventilation setup and maintaining it regularly, homeowners can create a cleaner, drier, and more comfortable bathroom environment for years to come.
FAQs
How Much Does Bathroom Exhaust Fan Installation Cost?
Bathroom exhaust fan installation usually costs between $250 and $900 depending on whether you are replacing an old fan or installing a completely new system with wiring and ductwork.
Can I Install A Bathroom Exhaust Fan Myself?
Yes, simple replacement projects are often DIY-friendly. However, new wiring, roof venting, or attic duct installation may require a licensed electrician or contractor for safety and code compliance.
Where Should A Bathroom Exhaust Fan Vent?
A bathroom exhaust fan should always vent directly outside through a roof, soffit, or exterior wall. It should never release humid air into an attic or crawlspace.
What Size Bathroom Exhaust Fan Do I Need?
Most bathrooms need at least 1 CFM per square foot of space. Larger bathrooms or bathrooms with showers and tubs may require more powerful ventilation systems.
How Long Does Bathroom Exhaust Fan Installation Take?
Replacing an existing fan may take 2–4 hours, while a new installation with ductwork and wiring can take a full day depending on the bathroom layout and venting path.
Enjoyed it? Find more exclusive content on The Styles Magazine.
Disclaimer: This article is for informational and educational purposes only. Electrical work, roof venting, and structural modifications may require professional assistance and must follow local building codes and safety regulations. Always consult a licensed contractor or electrician when necessary.