Walls slowly collect more dirt than most people notice. Dust settles on the surface, cobwebs form near ceilings, and fingerprints build up around switches, doorways, and hallways. Kitchen walls may also collect grease and food splashes, while children, pets, shoes, and furniture can leave marks in busy rooms.
Learning how to clean walls safely is mostly about using less moisture, less pressure, and a mild cleaning solution. The usual process is simple: remove dry dust first, wash small sections with a barely damp cloth, rinse away the soap, and dry the surface. Before starting, identify the paint finish and test your method in a hidden place. Flat and matte paint usually need much gentler treatment than satin, semi-gloss, or gloss paint.
This guide explains routine wall cleaning, safe stain removal, ceiling dusting, mop use, streak prevention, and wall preparation before painting. The aim is to help you get cleaner walls without fading the color, creating shiny patches, or damaging the paint.
Quick Guide: How to Clean Walls Safely
| Step | What to Do | Important Tip |
| 1. Check the paint | Identify whether the finish is matte, flat, satin, or gloss | Flat and matte paint need extra care |
| 2. Test first | Try the cleaner on a hidden area | Stop if the paint fades or transfers |
| 3. Remove dust | Use a microfiber duster, vacuum brush, or dry mop | Work from the ceiling downward |
| 4. Wash gently | Use warm water with a few drops of mild dish soap | Keep the cloth barely damp |
| 5. Rinse | Wipe with a separate cloth dampened with clean water | Remove all soap residue |
| 6. Dry | Use a clean microfiber towel | Dry quickly to prevent streaks |
| 7. Treat stains | Spot-clean fingerprints, grease, crayons, or scuffs | Start with the mildest method |
Identify the Paint Finish Before You Start
The paint finish affects how much washing and rubbing a wall can handle. Flat and matte finishes have little shine and often hide surface flaws well, but they are usually more delicate. Too much water or scrubbing can leave light areas, dark patches, or a shiny mark known as burnishing.
Eggshell has a soft, low sheen and is often somewhat easier to clean than flat paint. Satin has more shine and generally handles gentle washing well. Semi-gloss and gloss finishes are commonly used on trim, doors, kitchens, and bathrooms because they tend to resist moisture and are easier to wipe. Even so, a rough pad can still scratch them. Paint manufacturers generally advise a softer touch on low-sheen finishes and note that higher-sheen coatings are usually more washable.
Look closely at the wall before cleaning. Peeling edges, bubbles, cracks, powdery residue, exposed drywall, or paint that comes off when touched may show that the surface is already damaged. Washing such areas can make the problem worse. In that case, limit cleaning and plan for repair or repainting.
Wall-Cleaning Supplies and Gentle Solutions
You do not need a large collection of products. A vacuum with a soft brush attachment, a long-handled microfiber duster, a microfiber flat mop, two buckets, soft cloths, non-abrasive sponges, and clean towels are enough for most rooms.
For a basic wall cleaner, add only a few drops of mild dish soap to a bucket of warm water. Keep a second bucket of plain warm water for rinsing. Mild soap and warm water are widely recommended for painted walls because they can loosen everyday grime without the strength of harsh cleaners. The cloth or sponge should be damp, not wet, and should be wrung out thoroughly before it touches the wall.
Avoid steel wool, rough scrubbers, stiff brushes, and gritty powders. Strong degreasers, bleach, ammonia, solvents, and alcohol can alter some paint finishes. A product labeled as a wall cleaner is not automatically safe for every coating, so read its directions and test it first.
Prepare the Room and Test a Hidden Area
Move light furniture away from the wall and cover the nearby floor with old towels or a washable drop cloth. Take down pictures and small decorations so you can reach the surface evenly. Switch off power at the breaker when there is a real risk of moisture reaching an outlet or switch, and never spray cleaner directly onto electrical fittings.
Open a window or door if you are using any packaged cleaner. Apply a small amount of your chosen solution behind furniture, near the floor, or in another hidden place. Let the test spot dry fully before judging it. Check for color transfer on the cloth, fading, extra shine, dullness, streaks, or softening paint.
A hidden-area test matters even when you are using mild soap. Paint age, sheen, quality, previous cleaning, and wall condition can all change how the surface reacts. Paint manufacturers also recommend testing cleaning methods in an inconspicuous area before treating the whole wall.
Dry-Dust Walls and Ceilings First
Always remove loose material before adding water. If dust and cobwebs become wet, they can turn into gray smears that are harder to remove. Start at the ceiling, then move down the walls, trim, and baseboards.
Use a vacuum brush on low suction, a clean microfiber mop, or a long-handled duster. Move slowly so dust is captured rather than pushed into the air. Pay attention to ceiling corners, vents, crown molding, the tops of doors, and the areas behind furniture. Vacuuming walls and ceilings with a soft dust attachment is also recommended by major paint manufacturers before washing.
When cleaning walls and ceilings, use separate clean pads if one becomes dusty. A dirty mop head can spread marks across a pale ceiling. Do not press hard, especially on textured ceilings, loose paint, or fragile drywall surfaces.
Step-by-Step Method for Washing Painted Walls
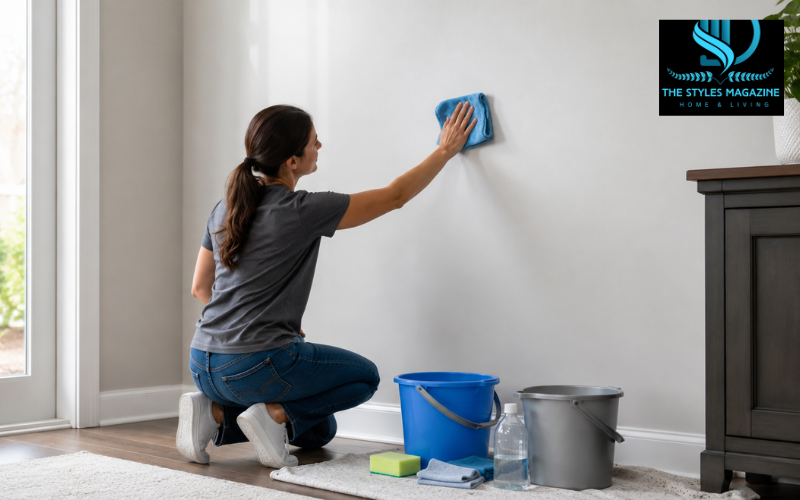
Work in small sections, roughly the width you can comfortably reach. Dip a soft cloth or sponge into the soapy water and wring it until it feels only slightly damp. Never allow water to run down the wall or collect around trim.
For washing, many paint-care instructions recommend starting near the bottom and moving upward. This helps you catch fresh drips before they travel over a dry area and leave long streaks. Wipe gently with short vertical or light circular motions. Do not scrub the same spot repeatedly.
After washing a section, use a different cloth dampened with plain water to remove soap. Rinse that cloth often so you do not put dirty water back on the wall. Finish by blotting or buffing the section with a dry microfiber towel. Official guidance from paint makers follows the same basic sequence: dust, wash gently with mild soap, rinse with clean water, and dry the surface.
How to Clean Walls With a Mop
A microfiber flat mop is useful for tall walls and large, open areas. It spreads pressure more evenly than a small sponge and reduces the need to climb. Use one dry pad for dusting and a different clean pad for washing.
Dip the washing pad lightly, then squeeze out as much water as possible. A dripping mop can leave watermarks, carry dirt downward, and allow moisture to enter seams or damaged drywall. Move the mop in controlled passes without leaning your full body weight against it.
Check the pad often. Once it becomes gray or greasy, rinse it well or replace it. Using a dirty pad is one of the main reasons walls look streaky after cleaning. Near outlets, switches, loose wallpaper edges, or damaged paint, change to a hand cloth so you can control the moisture more carefully.
How to Clean Walls Without Removing Paint
Begin with the mildest option: a dry microfiber cloth, followed by plain warm water if needed. Add a small amount of dish soap only when water alone does not remove the mark. This step-by-step approach reduces the chance of stripping or dulling the finish.
Use gentle pressure and stop immediately if color appears on the cloth. Do not assume that harder rubbing will solve the problem. On flat or matte paint, repeated rubbing can polish the surface and create a shiny patch that remains visible after drying. Abrasive cleaners and frequent scrubbing are common causes of paint burnishing.
Be especially careful with older paint and newly painted walls. Dry paint may still be curing beneath the surface. Manufacturer guidance varies by product, but waiting at least two weeks is common, while some coatings may take about 30 days to cure fully. Follow the instructions for the exact paint used whenever possible.
If a stain has soaked through the paint, or cleaning leaves a larger faded patch, stop. A small touch-up or repainting the full wall may produce a better result than repeated cleaning.
How to Clean Walls Without Streaks
Streak-free results depend more on technique than on a strong cleaner. Use fresh water, clean cloths, and a solution with very little soap. Too much detergent leaves a film that catches light and makes the wall look uneven.
Clean one small area at a time and do not let the solution dry before rinsing. Wring out the cloth well, catch drips immediately, and change the wash water when it becomes cloudy. Dry the wall with broad, light passes from a clean towel rather than rubbing one small area.
After the wall has dried, inspect it from the side in daylight. Side lighting makes soap residue, water trails, and missed spots easier to see. A faint streak may disappear with a clean, barely damp cloth followed by a dry microfiber towel. Avoid rewashing the entire wall unless it is truly necessary.
Removing Common Wall Stains and Marks
Fingerprints and oily marks are usually easiest to remove with warm water and a small amount of dish soap. Dab the area first, then wipe outward gently. Cleaning from the edge toward the center can help prevent a stain from spreading.
For pencil marks, try a clean white eraser with very light pressure. For crayon, marker, shoe scuffs, or furniture marks, begin with mild soap and water. A paste made from baking soda and water is sometimes suggested for stubborn marks, but baking soda is mildly abrasive. Use it only after testing, apply almost no pressure, and avoid it on flat or matte finishes. Sherwin-Williams lists a baking-soda paste as an option for tougher spots but still advises testing the method first.
Alcohol, hand sanitizer, solvent sprays, and products such as WD-40 may remove some ink or wax, but they can also soften, fade, or shine painted surfaces. They should not be a first choice for painted walls. Use a specialized treatment only when the paint maker permits it and a hidden test shows no damage.
For grease, hold a cloth with diluted dish soap against the mark briefly, then blot. Do not flood the area. If the stain remains after several gentle attempts, repainting may be safer than using a stronger chemical.
Cleaning Advice for Different Paint Finishes
Flat and matte paint should be dusted regularly and spot-cleaned only when needed. Use a barely damp cloth, minimal soap, and almost no friction. Dry the area at once. If the mark does not lift easily, a touch-up may be less noticeable than a polished cleaning patch.
Eggshell and satin finishes usually accept a light wash, but they can still change sheen if scrubbed. Use soft materials and rinse carefully. Semi-gloss and gloss paint are more suitable for frequent wiping, yet they can show fine scratches and dried soap more clearly because they reflect more light.
The label or technical information for the exact paint is more reliable than a general rule. Newer washable matte paints may perform differently from an older builder-grade flat paint. When you know the paint brand and product, check its cleaning and cure instructions before using anything stronger than mild soap and water.
Special Care for Kitchen, Bathroom, and High-Touch Walls
Kitchen walls often need more frequent attention because airborne oil can hold dust on the surface. Use a mild grease-cutting dish soap in warm water, but keep the mixture weak. Work slowly around the cooking area, rinse well, and repeat gently rather than increasing the strength at once.
In bathrooms, first identify whether a mark is ordinary soap residue, a moisture stain, or possible mold. Cleaning the surface will not fix a leak, poor ventilation, or moisture trapped behind paint. Peeling, bubbling, recurring dark growth, or a soft wall may require repair and moisture control rather than routine washing.
Around switches, doorframes, and trim, put cleaner on the cloth instead of the wall. Keep liquid away from outlet openings and wall gaps. A quick monthly wipe of high-touch areas can prevent heavy buildup and reduce the need for hard scrubbing later.
How to Clean Walls Before Painting
Clean walls help new paint form a more even bond. Begin by removing cobwebs, dust, loose paint, grease, and visible stains. In most living areas, warm water or mild soapy water is enough. Kitchen walls and other greasy surfaces may need a diluted grease-cutting detergent.
Rinse away every trace of cleaner because dried soap can interfere with the finish. Let the wall dry completely before applying primer, painter’s tape, or paint. Benjamin Moore and Sherwin-Williams both advise cleaning oily or dirty walls, rinsing them, and allowing the surface to dry before painting.
Once clean and dry, repair holes, cracks, peeling areas, and damaged joint compound. Sand patched places smoothly and remove the new dust. Stains that may bleed through should be handled with a suitable stain-blocking primer rather than covered with extra coats of wall paint.
Common Wall-Cleaning Mistakes and Online Tips to Treat Carefully
The first common mistake is washing before dusting. Another is using too much water, which can create runs, soften weak paint, or reach damaged drywall. Heavy scrubbing, rough pads, and repeated use of magic erasers may remove the mark but also change the wall’s color or sheen.
Be careful with online advice, including how to clean walls Reddit discussions. Personal tips may work on one type of paint and fail on another. Vinegar, bleach, rubbing alcohol, and strong degreasers should not be applied simply because a comment says they are safe. Check the cleaner label, the paint maker’s instructions, and a hidden test area first.
Never mix household cleaners. Combining bleach with ammonia or acidic products can release dangerous gases, and cleaning products should always be used according to their labels in a ventilated area.
Conclusion: Keep Walls Clean Without Creating More Work
The safest way to learn how to clean walls is to follow a careful order: identify the finish, inspect the paint, test a hidden spot, remove dry dust, wash gently, rinse, and dry. Mild soap, soft tools, clean water, and limited moisture will handle most everyday dirt.
Treat marks soon after they appear so they do not require aggressive cleaning later. Dust walls and ceilings from time to time, wipe high-touch areas when needed, and stop when a stain is no longer improving. Gentle maintenance protects the paint, reduces streaks, and keeps the room looking clean without turning a simple task into a repainting project.
Frequently Asked Questions
What Is The Best Thing To Use For Cleaning Painted Walls?
Warm water mixed with a few drops of mild dish soap is suitable for most painted walls. Apply it with a soft microfiber cloth and test it first.
How Can I Clean Walls Without Removing The Paint?
Use a barely damp microfiber cloth, mild soap, and gentle pressure. Avoid rough sponges, strong chemicals, and repeated scrubbing, especially on matte or flat paint.
How Do I Prevent Streaks When Washing Walls?
Clean small sections, use very little soap, rinse with clean water, and dry each area immediately. Change dirty water and cloths before they spread residue.
Can I Use A Mop To Clean Walls?
Yes. Use a clean microfiber flat mop with a separate pad for dusting and washing. Wring it thoroughly so water does not drip down the wall.
Should Walls Be Cleaned Before Painting?
Yes. Removing dust, grease, and stains helps new paint stick evenly. Rinse away cleaning residue and allow the wall to dry completely before repairing or painting.
Enjoyed it? Find more exclusive content on The Styles Magazine.
Disclaimer: Cleaning results depend on the paint type and condition. Always test products in a hidden area and follow the paint and cleaner manufacturers’ instructions.