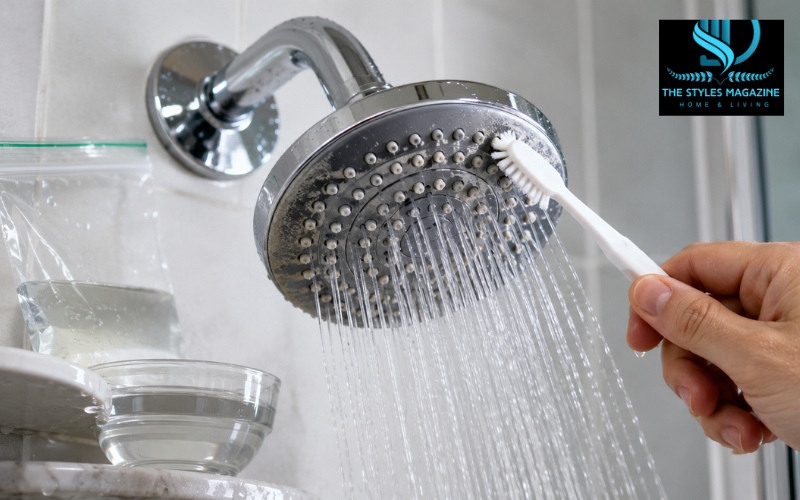
Learning how to clean a shower head is a simple part of bathroom maintenance that can improve the spray pattern and help water flow more freely. Over time, water passes through many small openings in the fixture. Minerals, dirt, and other particles can collect inside these openings and gradually block them.
The white or chalky material commonly seen around shower nozzles is usually mineral buildup from hard water. It may contain calcium and magnesium left behind after water dries. Limescale is a harder layer of this mineral buildup. Soap residue, dust, and small pieces of sediment from the plumbing can also collect on the surface, filter screen, and internal parts.
There are several ways to clean a shower head. You can soak it while it remains attached to the wall, remove it for a deeper clean, massage flexible rubber nozzles, or use alternatives such as lemon juice and mild dish soap. Distilled white vinegar is one of the most common choices because its mild acidity helps loosen mineral deposits. Some manufacturers recommend a mixture of equal parts white vinegar and water rather than full-strength vinegar.
The best method depends on how dirty the fixture is, what material or finish it has, and whether you are comfortable removing it. Always read the manufacturer’s care instructions before soaking a special, coated, or decorative shower head.
Quick Guide to Cleaning a Shower Head
| Cleaning method | Best for | Suggested time | Important note |
| Vinegar and water soak | Mineral buildup and limescale | About 30 minutes | Check finish-care instructions first |
| Plastic bag method | Cleaning without removal | 20–30 minutes | Use only enough liquid to cover nozzles |
| Baking soda paste | Light surface dirt | 5–10 minutes | Do not push paste into spray holes |
| Lemon juice | Light mineral deposits | 15–30 minutes | Test on a hidden area first |
| Warm soapy water | Routine surface cleaning | 10–15 minutes | Suitable for many delicate finishes |
| Manual nozzle cleaning | Rubber or silicone tips | A few minutes | Avoid sharp metal tools |
Signs Your Shower Head Needs Cleaning
A shower head often gives clear warning signs when mineral deposits or debris begin to affect its performance. One of the most common signs is an uneven spray. Water may shoot sideways, come out at unusual angles, or stop flowing through several nozzles.
Reduced water pressure is another possible sign. If the pressure is normal at other faucets but weak in the shower, deposits may be blocking the spray holes or the small filter inside the shower head. However, low pressure throughout the house may point to a plumbing or water-supply problem rather than a dirty fixture.
Look closely at the spray face. White or chalky marks often indicate calcium and limescale. Green or blue-green discoloration may be associated with deposits around metal parts, while brown particles can come from rust or sediment. Visible dirt, a stale odor, or water that remains trapped inside the fixture may also mean it needs cleaning.
Cleaning is especially useful when the problem develops slowly. A sudden and serious loss of pressure may have another cause, such as a blocked hose, closed valve, damaged fixture, or problem with the home’s water supply.
Supplies and Safety Checks Before You Start
Most cleaning methods require only common household supplies. You may need distilled white vinegar, fresh lemon juice, baking soda, mild dish soap, warm water, a plastic bag, a bowl, a rubber band or zip tie, and a soft toothbrush. A microfiber cloth is useful for wiping the finish, while a wooden toothpick can help clear individual openings.
An adjustable wrench may be needed when removing a tightly fitted shower head. Place a soft cloth between the wrench and the metal connection to reduce the risk of scratches.
Before applying any cleaner, check the manufacturer’s instructions. Different finishes may require different care. Brass, gold, nickel, bronze, matte black, and other plated or coated surfaces can be more sensitive than standard chrome. Kohler advises testing cleaners on a hidden area, using a soft cloth, and rinsing surfaces completely. Moen also warns against abrasive cleaners, ammonia, chlorine, bleach, and other harsh chemicals on its finishes.
Do not use steel wool, rough scouring pads, stiff wire brushes, or strong toilet cleaners. These products may scratch the surface, damage the coating, or shorten the life of the fixture.
How to Clean a Shower Head Without Taking It Off
The plastic-bag method is helpful when you want to clean a shower head without removing it from the wall. It works best for mild or moderate mineral deposits around the spray holes.
Fill a strong plastic bag with enough cleaning solution to cover the spray face. A cautious starting mixture is equal parts distilled white vinegar and water. Raise the bag over the shower head and make sure the nozzles are fully covered. Secure the bag around the neck of the fixture with a rubber band or zip tie.
Do not make the bag unnecessarily heavy. A large amount of liquid can place pressure on the shower arm. Use only enough solution to submerge the affected area.
Allow the nozzles to soak for about 30 minutes, unless the manufacturer gives different instructions. Some durable fixtures may tolerate a longer soak, but decorative or plated finishes may need a much shorter treatment. Do not automatically leave every type of shower head in vinegar overnight.
Remove the bag and pour away the used solution. Rub flexible nozzles with your fingers, then gently brush the spray face with a soft toothbrush. Turn on the shower and let water run for about one minute to flush out loosened particles.
How to Clean a Shower Head With Vinegar
Vinegar contains mild acid that can help dissolve the alkaline scale left by hard water. This makes it useful for clearing mineral buildup from shower nozzles and internal passages. Delta recommends a 50/50 mixture of white vinegar and water for difficult deposits and suggests using a soft cloth or toothbrush as the buildup loosens.
Use the bag method when the shower head is still attached. For a removable fixture, pour equal amounts of vinegar and water into a non-metal bowl and place the spray face in the solution. Make sure the container is stable and that the cleaner will not spill onto stone, grout, or other acid-sensitive bathroom surfaces.
A 30-minute soak may be enough for light deposits. Check the shower head during the process instead of assuming that a longer soak is always better. If buildup remains, gently brush it and repeat a short treatment rather than exposing a delicate finish to vinegar for many hours.
After soaking, rinse the shower head thoroughly with clean water. Wipe it with a soft cloth and run water through it. This removes loosened scale and any remaining vinegar from the internal parts.
Never mix vinegar with chlorine bleach. Mixing acidic cleaners with bleach can create dangerous fumes. Use one suitable cleaning product at a time and rinse the fixture completely.
Cleaning a Shower Head With Vinegar and Baking Soda
Vinegar and baking soda are often presented as a powerful cleaning combination because they bubble when mixed. However, the fizz does not mean the mixture is always more effective.
Vinegar is acidic, while baking soda is a base. When they are combined, they react and begin to neutralize each other while releasing carbon dioxide gas. The bubbling may help move loose dirt, but it also reduces the acidity that makes vinegar useful for dissolving mineral scale. The American Chemical Society describes this as an acid-and-base neutralization reaction.
For better results, use the two ingredients separately. First, apply vinegar and water to loosen mineral deposits. Rinse the shower head well. If greasy dirt or surface grime remains, make a mild paste from baking soda and water and apply it carefully with a soft cloth.
Do not pack baking soda into narrow spray holes. The paste can dry inside them and create another blockage. After cleaning, rinse every part thoroughly and run water through the shower head until no powder or residue remains.
How to Clean a Shower Head With Baking Soda
Baking soda can help remove light dirt, soap residue, and marks from suitable surfaces. It is less effective than an acidic cleaner for dissolving heavy calcium or limescale, but it can still be useful when vinegar is not available.
Mix a small amount of baking soda with water to make a thin paste. Test it on a hidden part of the fixture first. Although baking soda is often described as gentle, its small particles may still affect certain polished, plated, or delicate finishes if rubbed too firmly.
Apply the paste to visible grime with a damp microfiber cloth or very soft toothbrush. Use light pressure and clean only the affected area. Avoid spreading the paste into joints, moving parts, and small nozzle openings.
Rinse the fixture immediately after cleaning. Pay close attention to the rubber tips and spray holes because dried baking soda can leave a pale film or restrict water flow. Finish by running the shower for one minute.
How to Clean a Shower Head Without Vinegar
Fresh lemon juice is a useful option for people who do not want to use vinegar. Lemon juice contains citric acid, which may help loosen light mineral deposits. Place it in a plastic bag around the spray face or use it in a bowl for a removable shower head.
Start with a short soaking period of approximately 15 to 30 minutes. Test the solution on an unseen area first, especially if the shower head has a dark, matte, metallic, or decorative finish. Rinse it thoroughly when finished.
A diluted citric-acid solution can also remove scale, but it should be used only at the strength recommended by the product manufacturer. A stronger solution is not always safer or more effective.
For ordinary surface dirt, warm water and a few drops of mild dish soap may be enough. Wipe the fixture with a soft cloth, clean around the nozzles with a toothbrush, rinse it, and dry the finish. Mild soap and warm water are among the basic care methods recommended for many shower products.
Cleaning Without Vinegar or Baking Soda
It is possible to clean a shower head without vinegar or baking soda when the buildup is light or when the manufacturer does not recommend acidic cleaners.
If the fixture can be removed, soak suitable parts in a bowl of warm water mixed with a small amount of mild dish soap. Leave them for several minutes, then wipe the surfaces with a soft cloth. Use a toothbrush around edges and nozzle bases where dirt tends to collect.
Flexible rubber or silicone nozzles can often be cleaned by gently rubbing them with your fingers. This breaks brittle deposits away from the openings. A wooden toothpick may be used carefully on individual holes, but it should not be forced deeply into the shower head.
For deposits that do not respond to soap and water, look for a manufacturer-approved descaling product. Read the label to confirm that it is safe for the exact material and finish. Follow the stated contact time and never leave the cleaner on longer than directed.
How to Clean a Shower Head With Rubber Tips
Shower heads with flexible rubber or silicone tips are often easier to maintain because deposits can be loosened manually. Turn off the water and rub each tip gently between your fingers. You may notice small pieces of dry scale breaking away.
Next, use a soft toothbrush to clean around the base of the tips and across the spray face. Do not use a needle or sharp metal tool unless the manufacturer specifically allows it. Sharp tools may tear the rubber, enlarge the holes, or change the direction of the spray.
For harder deposits, apply a finish-safe vinegar solution for a short time and then massage the nozzles again. Delta specifically recommends wiping or rubbing its flexible Touch-Clean spray holes to break away mineral buildup.
Run the shower after cleaning. Move through every available spray setting so water can flush debris from all the internal channels.
Deep Cleaning a Removable Shower Head
Removing the fixture gives you access to parts that cannot be reached with the bag method. This can be helpful when the pressure is still weak after the outside nozzles have been cleaned.
Make sure the shower is turned off. Hold the shower arm steady and turn the connecting nut counterclockwise. Try loosening it by hand first. When a wrench is needed, cover the nut with a cloth or protective tape to avoid scratches.
Once removed, inspect the connector. Many shower heads contain a small mesh filter that catches sand, rust particles, and other sediment. Carefully remove the screen only when the product instructions permit it. Remember its position so it can be installed correctly later. Rinse it under clean water and brush away visible dirt.
Do not confuse the filter screen with the flow regulator. The regulator controls water use and may be required for the shower head to work correctly. WaterSense-labeled shower heads are designed to use no more than 2.0 gallons per minute while meeting performance requirements, so removing water-saving parts is not a suitable cleaning method.
Soak the removable spray face in an approved solution, clean the internal opening, rinse every part, and allow excess water to drain before reassembly.
Clearing Stubborn Clogs and Restoring Water Flow
When cleaning does not restore the spray, identify where the restriction is located. Blocked nozzles usually cause missing or sideways streams. A dirty filter may reduce flow across the whole spray face. A twisted handheld-shower hose can also limit water movement.
Use a wooden toothpick to loosen material at the entrance of a blocked nozzle. Work gently and avoid pushing debris farther inside. For flexible tips, rubbing and repeated rinsing are usually safer than using sharp objects.
Clean the filter screen if it contains grit, sand, or rust-colored particles. Reinstall it in the same direction. If debris quickly returns, the issue may be coming from the plumbing or water heater and may need further inspection.
Compare the shower flow with other fixtures in the home. When only the shower head is weak, the fixture is the likely source. When several faucets have suddenly lost pressure, contact the water supplier, building manager, or a qualified plumber. Cleaning the shower head will not correct a closed main valve, damaged pipe, failing pressure regulator, or wider supply problem.
Rinsing, Reattaching, and Preventing Leaks
Rinse all cleaned parts until no vinegar, soap, lemon juice, baking soda, or loose debris remains. Check the rubber washer inside the connection. A cracked, flattened, or missing washer may cause leaking and should be replaced with the correct size.
Remove worn thread-seal tape from the shower arm. Apply fresh plumber’s tape clockwise so it follows the direction in which the shower head will be tightened. Two or three neat wraps are commonly sufficient, although the product instructions should take priority.
Screw the shower head onto the arm by hand. Keep it straight to avoid damaging the threads. Tighten it until secure, but do not use excessive force. Overtightening can damage the connection, washer, or finish.
Turn on the shower and check the joint for dripping. If it leaks, turn off the water, check the washer and tape, and reconnect it. Finally, test every spray setting and watch for blocked or uneven streams.
Conclusion: Keeping Your Shower Head Clean
The safest way to clean a shower head depends on its finish and the amount of buildup. Mild soap and warm water are suitable for routine surface cleaning. Flexible nozzles can often be cleared by rubbing them gently, while a short soak in a manufacturer-approved vinegar solution can help dissolve mineral deposits.
When the spray remains weak, removing the fixture allows you to clean the filter and internal opening. Always protect the finish, keep water-saving components in place, rinse all cleaners away, and avoid abrasive tools.
Regular light cleaning is usually easier than waiting for thick limescale to develop. Check the spray face every few weeks and clean it when the water begins to spray unevenly. With gentle care and the right method, a clean shower head can provide a steadier spray without unnecessary replacement.
Frequently Asked Questions
How Often Should You Clean A Shower Head?
Clean your shower head every one to three months, depending on your water quality. Homes with hard water may need more frequent cleaning to prevent limescale and blocked nozzles.
Can Vinegar Damage A Shower Head?
Vinegar may damage some gold, brass, nickel, matte, stone, or plated finishes if left on too long. Check the manufacturer’s instructions and begin with a short, diluted treatment.
How Do You Clean A Shower Head Without Removing It?
Secure a plastic bag containing a suitable cleaning solution over the shower head. Keep the nozzles submerged, soak briefly, remove the bag, scrub gently, and flush with water.
Can Baking Soda Remove Limescale From A Shower Head?
Baking soda helps clean light dirt and soap residue, but it is less effective against heavy limescale. A finish-safe acidic solution usually works better for mineral deposits.
Why Is My Shower Pressure Still Low After Cleaning?
The blockage may be inside the filter, hose, valve, or plumbing system. If several fixtures have low pressure, the problem may require inspection by a qualified plumber.
Enjoyed it? Find more exclusive content on The Styles Magazine.
Disclaimer: This article provides general cleaning information. Always follow your shower head manufacturer’s care instructions and consult a qualified plumber if low pressure, leaks, or damage continue.