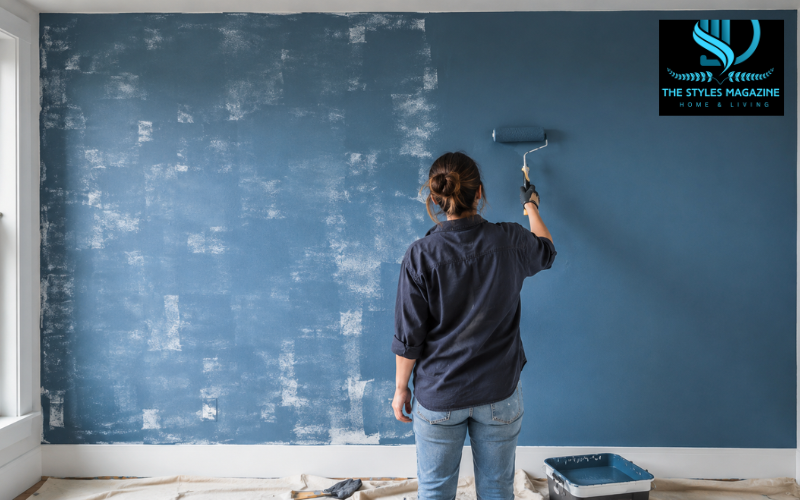
Uneven paint can make a freshly decorated room look unfinished, even when you have spent hours preparing and painting the surface. The problem may appear as patchy color, visible roller lines, rough drips, heavy brush marks, dull spots, shiny patches, or poorly blended touch-ups.
Learning how to fix uneven paint starts with identifying what went wrong. Thin coverage usually needs another full coat. Raised drips and ridges need to be flattened before repainting. Uneven sheen often points to poor surface preparation, unprimed filler, or inconsistent application. Treating every problem with a quick touch-up can make the finish look even more noticeable.
The most important first step is patience. Allow the existing paint to dry completely before sanding, scraping, priming, or applying another coat. Trying to smooth or repaint wet paint can pull the surface, create extra texture, and cause peeling. Check the drying and recoating information on the paint container because drying times vary with paint type, temperature, humidity, and ventilation.
Quick Guide to Fixing Uneven Paint
| Paint problem | Likely cause | Best solution |
| Patchy or thin coverage | Too little paint or uneven absorption | Apply a complete second coat from corner to corner |
| Roller lines | Dry roller, heavy pressure, or lost wet edge | Lightly sand raised lines and repaint with overlapping passes |
| Paint drips or runs | Too much paint in one area | Let them dry, scrape carefully, sand smooth, prime, and repaint |
| Heavy brush marks | Thick paint or overworking the surface | Sand the marks and apply a thin, even finishing coat |
| Uneven ceiling lines | Poor cutting-in or roller overlap | Smooth ridges and repaint the full ceiling section |
| Paint flashing | Unprimed patches or uneven paint absorption | Prime porous areas and apply a uniform topcoat |
| Uneven paint on wood | Rough grain, knots, or poor preparation | Sand with the grain, prime properly, and apply thin coats |
Identify the Type of Uneven Paint Before Starting
Inspect the surface in natural and artificial light. Side lighting often reveals defects that are difficult to see straight on.
If the old color shows through or some sections look lighter than others, the paint layer is probably too thin. This often happens when the roller is stretched too far, the wall absorbs paint unevenly, or a strong color is covered without suitable primer.
Physical texture problems are easier to feel. Run your hand lightly over the dry surface. Drips, runs, ridges, clumps, and heavy brush marks create raised areas that must be smoothed before more paint is applied. Adding paint over these defects usually preserves rather than hides them.
Uneven shine is known as flashing. Some areas may look glossy while others appear flat or dull, even though the same paint was used. Flashing commonly occurs over drywall repairs, filler, bare patches, or sections painted with different tools or pressure.
Also check for hard roller lines, visible ceiling bands, and touch-ups that do not blend. These issues may come from losing a wet edge, overworking drying paint, using mismatched paint, or repairing only a small spot on a large visible surface.
Tools and Materials Needed for Paint Repairs
You may need a paint scraper or putty knife for thick drips, a sanding block, medium- and fine-grit sandpaper, primer, matching paint, a quality brush, and a suitable roller cover.
Drop cloths and painter’s tape will protect floors, trim, sockets, and nearby furniture. A bright portable light is also useful because it can reveal ridges, scratches, and uneven sheen before you repaint.
Wear eye protection and a dust mask while sanding. If the surface is in an older home and may contain lead-based paint, avoid dry sanding or scraping until the paint has been properly assessed. Disturbing old coatings can release harmful dust. When you are unsure, seek qualified advice before continuing.
Prepare the Surface for a Smooth Repair
First, confirm that the paint is fully dry. Paint may feel dry on the surface while still being soft underneath, so follow the manufacturer’s recommended recoat time.
Clean the area before sanding or repainting. Grease, dust, and fingerprints can prevent new paint from bonding evenly. Use a little mild soapy water where needed, rinse away residue, and let the surface dry.
Remove loose paint carefully. Sand rough edges until they feel level with the surrounding surface, then wipe away every trace of dust. Paint applied over sanding dust can feel gritty and may peel later.
Protect the work area with drop cloths and tape. Before using a strong cleaner, primer, or repair method across a visible wall, test it on a small, less noticeable section. This is especially important on delicate finishes, stained wood, and older painted surfaces.
How to Fix Uneven Paint on a Wall
When a wall looks patchy but feels smooth, the simplest solution is usually another complete coat. Do not paint only the pale or thin areas unless the defect is very small and hidden. Spot repairs often dry with a different texture or sheen, making them more visible than the original problem.
Start by stirring the paint thoroughly. Pigments and sheen ingredients can settle in the container, so proper mixing helps the color and finish remain consistent. Use paint from the same container or batch when possible. If you have several cans, mixing them together in a larger clean container can reduce small color differences.
Cut in around the ceiling, corners, trim, and sockets, then roll the wall while the brushed edges are still workable. Apply paint in manageable sections and keep a wet edge. Each new roller pass should slightly overlap the previous pass before it begins to dry.
Use steady, moderate pressure. Pressing too hard squeezes paint from the roller edges and can create lines. Repaint from corner to corner rather than stopping in the middle of the wall.
Repairing Roller Marks and Uneven Paint Lines
Roller marks often appear as raised edges, darker overlap bands, or areas with a different texture. If the marks are only differences in color and the surface is smooth, another properly applied coat may correct them. Raised lines, however, should be sanded first.
Wait until the paint has dried, then lightly sand the hard edges with fine-grit sandpaper. Use a sanding block to keep the pressure even. Wipe away the dust and check the surface with side lighting.
When repainting, load the roller evenly and work in sections. Overlap each pass slightly while the previous section remains wet. Finish with light strokes in the same direction to create a consistent texture. Do not keep rolling over paint that has started to set. Once paint becomes tacky, additional passes can lift it and leave rough marks.
Uneven paint lines may also come from using a roller cover that is too dry. Reload before the roller stops releasing paint smoothly.
How to Fix Uneven Paint Lines on a Ceiling
Ceiling lines are especially noticeable because light travels across the surface. First, determine whether the problem comes from the cut-in line around the edges or from roller overlap across the main ceiling.
If the edge line is uneven, allow it to dry and gently sand any raised brush marks. Recut the edge with a quality angled brush, using a steady hand and a small amount of paint. Avoid creating a thick border around the ceiling because it may show through the rolled finish.
For visible roller bands, smooth any ridges and repaint a full ceiling section rather than touching up individual stripes. Work across the shorter dimension of the room when practical, keeping each section wet as you continue. Use consistent roller pressure and avoid stopping in the center of an open area.
Recoating the entire ceiling usually gives a more even result than repairing scattered areas.
Fixing Paint Drips, Runs, and Spray Sags
Drips and runs form when too much paint collects in one place. They are common around corners, trim, lower wall sections, and sprayed surfaces. Do not wipe or brush a drip once the surrounding paint has started to dry because this can spread the defect and leave a larger rough patch.
Allow the paint to dry fully. Use a sharp paint scraper or putty knife to remove the thickest raised section. Work slowly and keep the tool almost flat against the surface to avoid digging into the wall or wood.
Sand the remaining ridge with medium-grit sandpaper, such as 100- or 120-grit, then switch to a finer grit, such as 180- or 220-grit, to smooth the repair. Clean away the dust. If sanding exposes bare drywall, filler, or wood, apply a suitable primer before painting.
For spray sags, apply future coats more lightly and keep the sprayer moving at a steady speed and distance. After the repaired area is smooth and primed, apply controlled finishing coats and allow proper drying time between them.
Smoothing Clumps, Ridges, and Heavy Brush Marks
Clumps can come from dried paint in the container, a dirty brush, debris on the surface, or paint that has begun to skin over. Ridges and heavy brush marks often result from thick paint, overworking, or using the wrong applicator.
Once the finish is dry, scrape away obvious lumps and sand the raised texture until it blends with the surrounding area. Feather the edges by sanding beyond the center of the defect with lighter pressure. This avoids creating a sharp dip around the repair.
Clean the surface thoroughly before repainting. If the area is large or the wall has many heavy marks, it may be better to sand the full section and apply a fresh coat rather than repairing each mark separately.
Match the applicator to the surface. A smooth wall usually needs a short-nap roller, while a textured wall may need a thicker nap to reach low areas. On trim and furniture, a quality brush or small foam roller can provide a smoother finish, depending on the paint and surface.
How to Fix Paint Flashing and Uneven Sheen
Paint flashing appears when sections reflect light differently. This often happens when filler or drywall compound absorbs paint differently from the surrounding painted surface.
Lightly sand any overly glossy or rough spots when the paint instructions allow it. Then apply primer over bare, patched, stained, or highly porous sections. Primer creates a more even base and reduces uneven absorption.
Small touch-ups can flash because the new paint has a different sheen, age, or texture from the original finish. Even paint from the same can may look different if it is applied with a brush instead of the roller used on the wall.
For a highly visible wall, the most reliable solution is to prime repaired areas and apply one uniform topcoat across the entire wall. Use the same roller type, pressure, and direction throughout. This creates a consistent surface texture and helps the sheen look even under changing light.
How to Fix Uneven Paint on Wood
Uneven paint on wood may be caused by rough grain, knots, old varnish, moisture, or poor cleaning. Before repainting, check that the wood is dry, solid, and free from loose finish. Grease and polish must be removed because they can stop paint from bonding.
Sand in the direction of the grain. Begin with a medium grit if the surface is rough, then finish with a finer grit for smoothness. Avoid sanding deeply into thin veneers or detailed edges. Wipe away dust with a clean cloth.
Bare wood usually benefits from a suitable wood primer. Knots and stains may need a stain-blocking primer so they do not show through the new finish. Glossy old paint should be cleaned and lightly scuffed to improve adhesion.
Apply thin, even coats and inspect edges, corners, and grooves where paint can collect. Brush out runs before the paint begins to set. Allow each coat to dry as directed, then lightly sand between coats when recommended for a smoother final result.
Fixing a Bad Paint Job on Walls: Touch Up or Repaint?
A small hidden mark may be suitable for a touch-up, especially when you still have the original paint and the wall was painted recently. Use the same applicator and apply as little paint as possible, feathering the edges gently.
A full repaint is usually better when defects cover a large area, the wall has many roller lines, or touch-ups are visible from normal viewing distance. Repainting is also wise when the existing paint has faded, the sheen does not match, or the wall texture is inconsistent.
Consider the lighting in the room. Higher-sheen paints highlight surface defects more than flat finishes. In these situations, repairing the surface and recoating from corner to corner gives a cleaner appearance.
Extensive peeling, moisture damage, deep cracks, or widespread adhesion failure may require more than sanding and repainting. The cause must be corrected first. Professional help may be appropriate when the coating is unstable, the surface is difficult to access, or old paint may contain hazardous materials.
Preventing Uneven Paint in Future Projects
Prevention begins with a clean, dry, and properly primed surface. Repair holes and cracks, sand rough areas, and seal porous patches before applying the topcoat. Skipping primer can lead to patchy coverage and uneven sheen.
Stir paint thoroughly before starting and occasionally during a long project. Use a quality roller cover with the right nap for the wall texture. Keep the roller loaded, but not dripping, and apply steady pressure.
Plan the work so you can finish one wall or ceiling section without long breaks. Maintain a wet edge and avoid returning to areas that have started drying. Follow the stated drying and recoating times rather than rushing the next coat.
Room conditions matter as well. Very high humidity, low temperatures, strong heat, or direct airflow can affect how paint dries. Provide reasonable ventilation without directing a fan at the wet surface. Good lighting will help you spot missed areas, runs, and roller lines while they are still easy to correct.
Conclusion: Restoring a Consistent Painted Finish
Knowing how to fix uneven paint is mainly about matching the repair to the defect. Smooth patchy coverage usually needs a complete new coat. Raised drips, ridges, and brush marks must be flattened first. Flashing and dull patches often require primer followed by a uniform topcoat.
Do not rush the process. Let the paint dry, prepare the surface carefully, remove dust, and use consistent tools and pressure. When defects are widespread, repainting the full wall or ceiling section is usually more successful than making many small touch-ups.
With patient preparation and thin, even coats, most uneven paint problems can be corrected without making the finish worse. The result should be a smoother, more consistent surface that looks clean in both natural and artificial light.
FAQs
Can I Paint Over Uneven Paint Without Sanding?
You can repaint smooth, patchy coverage without sanding. However, raised drips, roller ridges, clumps, and brush marks must be sanded flat, or they may remain visible through the new coat.
Why Does My Wall Still Look Patchy After Two Coats?
Patchiness may result from porous repairs, poor primer coverage, mismatched paint, an underloaded roller, or uneven pressure. Prime absorbent areas and repaint the entire wall using a consistent technique.
How Do I Fix Paint Flashing On A Wall?
Lightly sand rough or glossy areas, prime bare drywall and repaired patches, and then apply one even topcoat across the whole wall using the same roller and steady pressure.
Should I Touch Up Uneven Paint Or Repaint The Whole Wall?
A small hidden defect may blend with a careful touch-up. For visible patches, roller lines, color differences, or uneven sheen, repainting from corner to corner usually produces a more consistent finish.
How Long Should Paint Dry Before Fixing Uneven Areas?
Follow the drying and recoating time printed on the paint container. The coating must be fully dry before sanding or scraping, as working on soft paint can damage the surface.
Enjoyed it? Find more exclusive content on The Styles Magazine.
Disclaimer: This article provides general painting guidance. Follow the paint manufacturer’s instructions and seek professional advice before disturbing old coatings that may contain lead or other hazardous materials.