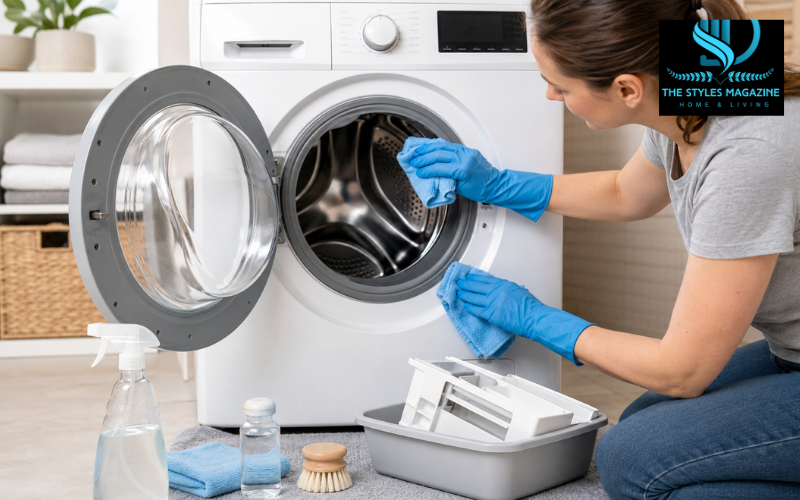
Learning how to clean washer parts properly is not only about making the drum look bright. A complete clean includes the inside of the drum, detergent dispenser, door or lid, rubber seal, accessible filter, and exterior surfaces. These areas collect detergent film, fabric softener, lint, hair, dirt, and moisture during normal use.
When residue stays damp, it can create a musty smell and leave the machine feeling less fresh. A dirty dispenser may also hold thick soap deposits, while a blocked filter can contribute to poor drainage or unpleasant odors. Front-load, top-load, and automatic washers need many of the same basic cleaning steps, but their seals, filters, and built-in cleaning programs may differ.
This guide explains how to clean a washer safely from the inside out. Always treat the owner’s manual for your exact model as the final authority, especially when choosing a cleaning product, opening a filter compartment, or using a self-cleaning cycle.
Quick Guide: How to Clean Washer
| Washer Part | Cleaning Method | When to Clean |
| Inner drum | Run an empty Drum Clean, Tub Clean, or approved hot cycle | Monthly or when odors appear |
| Detergent dispenser | Remove, soak in warm soapy water, scrub, and rinse | Every few weeks |
| Rubber gasket | Wipe inside all folds and remove lint or trapped water | Weekly for front loaders |
| Drain filter | Drain water, remove debris, rinse, and reinstall securely | Follow the machine manual |
| Door or lid | Wipe with a damp microfiber cloth and dry | Weekly |
| Exterior | Clean gently with mild cleaner applied to a cloth | As needed |
Signs Your Washing Machine Needs Cleaning
A washer does not have to look dirty to need attention. The first warning is often a stale or musty smell when you open the door or lid. You may also notice that freshly washed clothing does not smell as clean as expected, even though you used the correct detergent and cycle.
Front-load machines can develop dark marks, hair, lint, or slippery residue inside the folds of the rubber door gasket. Top-load washers may collect grime under the lid, around the upper tub rim, or inside removable dispensers. Sticky detergent and fabric-softener buildup are other clear signs that moisture and product residue are not rinsing away fully.
Slow drainage, standing water, or visible debris in an accessible filter may point to a clogged filter or drain problem. If cleaning the filter does not correct the issue, stop using the machine and check the manual or arrange professional service rather than taking apart internal components.
Cleaning Supplies and Safety Preparation
Before starting, empty the washer and gather a few simple items: microfiber cloths, a soft toothbrush, mild dish soap, warm water, protective gloves, towels, and a shallow bowl or tray. Use a washing machine cleaner that is approved for your appliance when cleaning the drum. A soft brush is safer than abrasive pads, which may scratch finishes or damage rubber.
Unplug the washer before opening a user-accessible drain-filter panel or removing parts that the manual says can be taken out. Do not pull off fixed panels, disconnect hoses, or reach into electrical areas. If the machine has recently completed a hot cycle, allow the water and internal parts to cool before draining a filter.
Never mix chlorine bleach with vinegar, ammonia, or any other cleaner. Dangerous fumes can be released when bleach is combined with other household products. Use only one cleaning method at a time, keep the room ventilated, and follow the cleaner label exactly.
Start with an Empty Drum-Cleaning Cycle
Remove all clothing, coins, tissues, and loose objects from the drum. Look for a setting called Clean Washer, Tub Clean, Drum Clean, Eco Drum Clean, Self Clean, or a similar name. If the machine does not have a dedicated maintenance cycle, the manual may direct you to use a normal empty cycle with a suitable hot-water setting.
Place the cleaning product exactly where its label and the washer manual direct. Some tablets go directly into the empty drum or basket, while certain liquid products belong in a dispenser. Do not assume that regular detergent should be added. Samsung, for example, says not to use normal laundry detergent with some Eco Drum Clean programs, while Whirlpool directs users of compatible models to place an affresh tablet in the bottom of the empty basket.
Start the cycle and let it finish without interruption. When it ends, inspect the drum and wipe away loosened residue. Leave the door or lid open so the inside can dry. Run an extra rinse only when the product instructions recommend it or when visible cleaner or loosened residue remains.
Using a Washing Machine Cleaner Correctly
Washing machine cleaners are sold as tablets, powders, and liquids. The form matters less than compatibility and correct use. A tablet may be designed to dissolve slowly during a long cleaning cycle, while a powder or liquid may require a particular dispenser compartment or water temperature.
These products are made to loosen detergent film and odor-causing residue in areas that are difficult to reach by hand. However, more cleaner is not better. Too much product may create excess foam or leave residue behind. Follow the stated dose and never add clothes, towels, or other laundry during the maintenance cycle.
Check whether your washer requires a specific product type. Whirlpool says its Clean Washer cycle may use affresh, liquid chlorine bleach, or another approved washing-machine cleaner depending on the model and care guide. Product compatibility can differ even between machines from the same brand, so the instructions for your exact model should take priority.
How to Clean Washer Machine with Vinegar
White vinegar is often suggested as a homemade washer cleaner, but it is not suitable for every machine. Some manufacturers warn that repeated exposure to vinegar may damage rubber seals, hoses, or other components over time. Maytag currently advises against pouring vinegar into the washer drum for routine machine cleaning.
For that reason, check the care manual before using vinegar. When the manufacturer allows it, use only the stated amount and place it in the location the manual identifies. Do not guess at a universal quantity because drum size, materials, and cycle design vary.
Baking soda should also be used only when the manufacturer permits it. Never use vinegar in the same cleaning session as chlorine bleach, and do not combine several household products in the hope of creating a stronger cleaner. A washer-cleaning tablet or the brand’s recommended product is usually the simplest choice when the manual does not clearly approve a homemade method.
How to Clean Washer Front Loader Models
Begin with the empty drum-cleaning cycle recommended for your model. After the cycle, open the door and wipe the glass on both sides, paying attention to the lower edge where water and lint may collect.
Next, clean the rubber gasket. Gently pull back each fold and remove hair, threads, small objects, and visible grime with a damp microfiber cloth. Use mild soapy water or a manufacturer-approved cleaner rather than a sharp tool or rough scrubber. Front-load washer makers advise cleaning both the outside and the inner surfaces of the door seal because residue can remain hidden inside its folds.
Wipe the gasket again with clean water if soap was used, then dry it carefully. Also dry the door glass and the lower part of the opening. Leave the door partly open after cleaning, provided it is safe from children and pets, so trapped moisture can escape. Samsung also recommends leaving the detergent drawer open to help it dry.
How to Clean Washer Top Loader Models
For a top loader, wipe the underside of the lid, the hinges, the top edge of the basket, and the tub rim. These areas can collect splashes and detergent residue even when the main drum appears clean. Remove and wash any dispenser cups that the manual identifies as removable.
Run the machine’s Tub Clean, Self Clean, or other approved maintenance program with the basket empty. If no cleaning program is provided, follow the manual’s alternative cycle directions. Do not force the lid open while the cleaning cycle is running.
Traditional top loaders have a tall central agitator, while impeller models use a low-profile plate at the bottom. Clean only the surfaces you can reach safely. Some agitator caps or dispensers lift out, but others are fixed and should not be forced. Wipe around the base with a soft cloth or brush and avoid pouring cleaner into hidden openings unless the manual specifically directs it.
How to Clean Washer Filter Safely
Not every washer has a filter that the owner can remove. Many front-load machines have a drain-pump filter behind a small lower access door, while some top-load machines use lint filters in different locations. Use the manual to confirm that a filter is user-serviceable before opening anything.
Switch off and unplug the washer. Place towels and a shallow container below the access panel because trapped water may spill out. If there is a small emergency drain hose, open it slowly and collect the water before unscrewing the main filter cap. Samsung’s maintenance guidance similarly advises placing a towel below the pump filter, turning the filter counterclockwise, rinsing it under running water, and locking it back in place.
Remove lint, hair, coins, buttons, and other debris. Rinse the filter with warm water and use a soft brush if needed. Check that the sealing area is clean, reinstall the filter in the correct position, and tighten it securely without forcing it. A loose filter may leak. If the cap will not move, the water is very hot, or drainage problems continue, seek qualified service.
Cleaning the Dispenser, Gasket, Door, and Exterior
Pull out the detergent drawer only if it is designed to be removed. Most removable drawers have a release tab. Soak the drawer in warm, soapy water, then scrub the compartments with a toothbrush to loosen thick detergent and fabric-softener deposits. Rinse and dry it before reinstalling.
Wipe the empty drawer cavity with a damp cloth, but do not flood it with water. Clean the gasket, lid, door frame, and glass using soft materials. Avoid knives, metal brushes, abrasive powders, and harsh products that could cut the seal or damage printed labels.
For the exterior, apply mild cleaner to a cloth instead of spraying directly into the control panel. Wipe the buttons, knobs, handle, sides, and top surface, then dry them. Keeping the control area only lightly damp reduces the chance of moisture entering gaps around electronic parts.
How to Clean Automatic Washing Machine from Inside
An automatic washer still needs manual care because its self-cleaning program mainly treats the drum and internal water path. It does not always remove grime from the dispenser, door seal, lid rim, or accessible drain filter.
Start by emptying the drum and running the approved self-cleaning cycle. Afterward, clean the dispenser and any removable inserts, inspect the gasket or upper tub rim, and check the user-accessible filter. Wipe away loosened residue and dry each area.
Keep the washer empty throughout the maintenance process. If foam, cleaner, or dark particles remain after the main cycle, follow the product label or manual regarding an additional rinse. Do not repeatedly run hot cycles when the machine shows an error, leaks, or fails to drain. Those signs need troubleshooting rather than more cleaner.
Cleaning Samsung and Whirlpool Washers
To understand how to clean washer Samsung models, first check the control panel and manual. Depending on the region and model, the maintenance program may be named Self Clean, Self Clean+, Pure Cycle, Drum Clean, Eco Drum Clean, or Eco Tub Clean. Samsung’s current guidance says to keep the washer empty during these cycles, and some Eco Drum Clean programs should be run without ordinary laundry detergent.
Samsung commonly recommends running a tub-cleaning cycle about once a month, although the machine’s reminder and the exact manual should guide the schedule. After the cycle, dry the gasket and leave the door and dispenser open when safe to do so.
For information on how to clean washer Whirlpool models, look for Clean Washer or Clean Washer with affresh. On compatible models, Whirlpool directs users to place one affresh tablet at the bottom of the empty basket and start the cleaning cycle. Whirlpool also recommends regular monthly cleaning for many models, but the allowed cleaner and exact steps may differ.
Common Washer-Cleaning Mistakes
The most serious mistake is mixing cleaners. Bleach must never be combined with vinegar, ammonia, or another cleaning product. Another common problem is using too much detergent or washer cleaner, which may leave more residue rather than solving the original issue.
Do not scrub rubber seals with sharp or abrasive tools, and never run a self-cleaning program with clothes in the drum. Avoid forcing a dispenser, agitator cap, or filter that the manual does not identify as removable. It is also a mistake to copy instructions from a different brand or model without checking compatibility.
Finally, do not close a damp washer immediately after cleaning. Dry the gasket, door, lid, and dispenser area, then allow safe ventilation. Moisture control is one of the easiest ways to reduce the return of musty smells.
A Simple Routine to Keep the Washer Fresh
Remove clean laundry soon after each cycle instead of leaving damp items in the drum. Wipe visible water from a front-loader gasket and door glass, especially if you wash frequently. Leave the door or lid and detergent drawer slightly open when it is safe to do so.
Measure detergent according to the product label, load size, soil level, and water conditions. High-efficiency washers should use the detergent type specified by the manufacturer. Excess detergent can create a film that traps soil and moisture.
Check the filter on the schedule in your manual and clean the dispenser before residue becomes thick. Run the approved maintenance cycle when the washer displays a reminder, develops an odor, or reaches the interval recommended by the manufacturer. Samsung and Whirlpool commonly advise monthly cleaning for many current models, but model-specific guidance remains the best rule.
Conclusion: A Cleaner Washer Starts with Regular Care
Knowing how to clean washer parts properly means caring for more than the drum. A complete routine includes the cleaning cycle, detergent dispenser, gasket or tub rim, door or lid, accessible filter, and exterior. Each part should be cleaned gently, rinsed when needed, and dried afterward.
The safest method is always the one approved for your exact machine. Check the manual before using vinegar, bleach, baking soda, a commercial cleaner, or a filter-removal procedure. Never mix cleaning products.
Regular drying and light maintenance can prevent heavy residue from building up. Remove wet clothing promptly, use the correct amount of detergent, allow safe airflow, and run the recommended cleaning cycle on schedule. These small habits help the washer stay fresher and support cleaner-smelling laundry.
Frequently Asked Questions
How Often Should I Clean My Washing Machine?
Clean the washer drum about once a month or when odors and residue appear. Wipe the gasket and dispenser more often, especially when the machine is used frequently.
Can I Use Vinegar To Clean My Washer?
Vinegar may be suitable for some washers, but repeated use can affect certain rubber parts. Always check your machine’s care manual before using vinegar or another homemade cleaner.
How Do I Remove A Bad Smell From My Washer?
Run an empty approved cleaning cycle, scrub the dispenser, wipe the gasket, and clean the accessible filter. Afterward, leave the door or lid open so moisture can escape.
Should I Put Detergent In A Washer-cleaning Cycle?
Regular laundry detergent is usually unnecessary during a self-cleaning cycle. Use only the cleaner and amount recommended by the washer manufacturer or the cleaning product instructions.
Why Does My Washer Still Smell After Cleaning?
Odors may remain when residue is trapped in the gasket, dispenser, filter, or drain system. Repeat the approved cleaning steps and seek professional help if drainage problems continue.
Enjoyed it? Find more exclusive content on The Styles Magazine.
Disclaimer: This guide provides general information. Washer designs and cleaning requirements vary, so always follow the manual and safety instructions provided for your exact model.