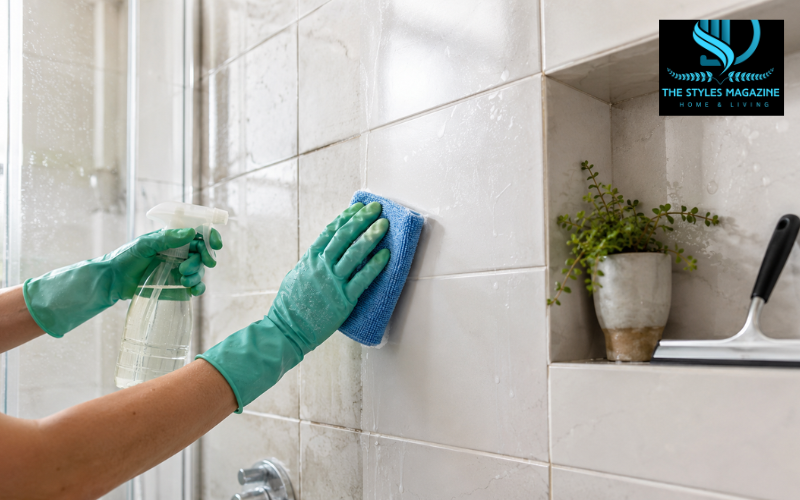
A Safe and Effective Approach to Cleaning Shower Trrectly can freshen the bathroom without harming tile, grout, caulk, or sealer. Shower walls and floors collect soap residue, skin oils, minerals, and dirt. Damp conditions may also cause mold-like spotting around grout, corners, and caulk.
Do not reach immediately for the strongest cleaner. First, identify the surface, then use the mildest product that can remove the buildup. A simple routine usually works best: soften the grime, apply a suitable cleaner, allow it time to work, scrub gently, rinse well, and dry the area completely.
This guide covers common tile materials, stains, mold, grout, prevention, and the safe use of vinegar, baking soda, and hydrogen peroxide.
Quick Guide: How to Clean Shower Tiles
| Step | What to Do | Important Tip |
| 1. Identify the tile | Check whether it is ceramic, porcelain, glass, or natural stone. | Avoid acidic cleaners on natural stone. |
| 2. Loosen the grime | Run a hot shower or wet the tiles with warm water. | Warm moisture helps soften soap scum. |
| 3. Apply cleaner | Spray a cleaner suitable for the tile material. | Work from the top of the shower downward. |
| 4. Let it work | Leave the cleaner for 5–10 minutes or follow its label. | Do not allow the product to dry. |
| 5. Scrub gently | Use a microfiber sponge or soft nylon brush. | Avoid steel wool and wire brushes. |
| 6. Rinse well | Wash away dirt and all cleaner residue. | Leftover cleaner may create haze. |
| 7. Dry the tiles | Use a squeegee and dry microfiber cloth. | Drying helps prevent mold and water spots. |
Identify Your Shower Tile Before Choosing a Cleaner
Ceramic and porcelain tiles are common in showers because they are durable and usually easy to maintain. Glazed ceramic often has a smooth, shiny, or patterned surface. Porcelain is denser and may look like stone, concrete, or wood. Glass tile has a reflective surface and visible depth, while natural stone has variations, veins, pores, and patterns that rarely look exactly the same from one tile to another.
Marble commonly has soft veining. Travertine often has small pits or filled holes. Slate usually has a layered, textured appearance, while limestone tends to have a softer, more even finish. These are only clues. When unsure, check installation records or manufacturer guidance before using acidic or strong cleaners.
Acids such as vinegar and lemon juice can dull or etch marble, limestone, travertine, and other sensitive stone. Abrasive powders can scratch some tile finishes, and harsh chemicals may discolor grout or weaken certain sealers. Natural Stone Institute guidance recommends neutral cleaners made for stone and warns that acidic products can damage calcareous stone. tial Tools and Cleaning Supplies
Only a few tools are needed. For routine cleaning, gather a microfiber cloth, a non-scratch sponge, a soft nylon tile brush, a grout brush or old toothbrush, a spray bottle, a bucket, a squeegee, and protective gloves.
Choose a cleaner that lists your tile material as safe. Mild dish soap and warm water are useful for light dirt and body oils. A pH-neutral tile cleaner is the safer general option when the material is uncertain, while a stone-specific neutral cleaner is the correct choice for natural stone. Baking soda and hydrogen peroxide may help selected grout stains, but test them first.
Avoid steel wool, wire brushes, rough scouring pads, razor blades, and gritty powders unless the tile manufacturer specifically permits them. Glass-tile care guidance recommends non-abrasive products and advises against steel wool, scouring pads, sandpaper, and similar tools. est Way to Clean Shower Tiles Step by Step
Begin by ventilating the bathroom. Open a window or door and run the exhaust fan. Remove loose items so you can reach the whole surface.
Run a hot shower for about five minutes, or wet the tiles with warm water. The goal is to soften dried soap and mineral film, not to “open” the tile. Turn off the water, then apply the correct cleaner from the top of the wall downward so drips move across untreated areas.
Let the product remain for the time given on its label. For a mild homemade solution, five to ten minutes is usually enough, but do not allow it to dry on the surface. Agitate the film with a microfiber sponge using gentle circular or S-shaped movements. Give grout lines extra attention with a nylon brush rather than applying more force to the tile.
Rinse thoroughly with clean, warm water. Leftover cleaner can create haze or make the floor slippery. Finish by using a squeegee on walls and a dry microfiber cloth around grout, corners, fixtures, and the shower floor. Complete drying is especially important because moisture control is central to preventing recurring mold. o Clean Ceramic and Porcelain Shower Tiles with Vinegar
Diluted white vinegar can dissolve some soap film and light mineral buildup on certain glazed ceramic and porcelain tiles. However, it is not automatically safe for every installation. Acid may affect grout, unglazed tile, decorative finishes, metal trim, and sealers. Several manufacturers recommend non-acidic cleaners for routine grout care because repeated vinegar use can cause damage over time.
When the manufacturer permits it, mix equal parts white vinegar and water. Add only a few drops of mild dish soap if the shower has greasy soap scum. Test the solution in a hidden area, including a grout line, and check for dulling or color change after it dries.
Apply it mainly to the tile face, leave it for no more than five to ten minutes, and keep it from drying. Wipe gently, rinse with plenty of clean water, and dry. Do not use it on natural stone, damaged or unsealed grout, or surfaces that prohibit acids.
For regular weekly cleaning, mild soap or a pH-neutral tile cleaner is usually a lower-risk choice.
Safe Cleaning for Glass and Natural-Stone Shower Tiles
Clean glass shower tiles with diluted dish soap or a non-abrasive cleaner labeled for glass or tile. Use a microfiber cloth, rinse, and squeegee to prevent streaks. Avoid gritty powders and scraping tools because even small scratches can remain visible under bathroom lighting.
Natural stone needs a different routine. Use a pH-neutral stone cleaner mixed exactly as directed. Never use vinegar, lemon juice, acidic bathroom sprays, or unapproved bleach products on marble, limestone, travertine, slate, or other stone. Stone-care guidance warns that even a weak vinegar-and-water solution can etch and gradually damage many varieties of natural stone. d dry the stone with a soft cloth. If water quickly darkens or soaks into the stone or grout instead of beading, ask the stone supplier or installer whether resealing is needed. A water-drop test may also indicate whether cement grout sealer is working. o Clean Shower Tiles Naturally
For natural cleaning, begin with warm water and mild dish soap. This is often enough for fresh body oils and light soap residue. Apply it with a soft sponge, allow a few minutes of contact time, rinse, and dry.
A paste of baking soda and water can help loosen marks on durable, compatible surfaces. Because baking soda is mildly abrasive, avoid assuming it is safe for polished stone, glass, metallic tile, or glossy finishes. Test it in an inconspicuous spot and rub lightly rather than pressing hard.
Hydrogen peroxide may lighten organic grout stains but can affect colored grout. Test first, wear gloves, ventilate the room, and never combine it casually with other household chemicals.
Steam from a warm shower can soften buildup before cleaning, while good airflow helps the area dry faster afterward. These habits often reduce the need for stronger products.
How to Clean Shower Tiles Without Heavy Scrubbing
Reduce scrubbing by giving moisture and cleaner time to loosen the film. Wet the tiles with warm water, apply the correct product evenly, and leave it for the label’s recommended contact time. If the cleaner starts drying, work in smaller sections instead of adding force.
Use a damp microfiber pad or soft sponge to lift the softened residue. Rinse, inspect the tile, and repeat the mild treatment on remaining patches. Two gentle cleaning rounds are usually safer than one aggressive round with a rough pad.
A “no-scrub” method may remove fresh film, but old buildup usually needs light agitation. If buildup does not improve after a safe second attempt, use a product designed for that specific stain and tile type rather than scraping the surface.
Removing Soap Scum, Hard-Water Marks, and Other Tile Stains
Soap scum often looks cloudy, greasy, or chalky. Mild dish soap or a tile-safe soap-scum remover can break down its oily part.
Hard-water deposits are often white, gray, or crusty. An acidic cleaner may remove them from some acid-safe manufactured tiles, but natural stone requires a stone-approved mineral-deposit product.
Rust stains are orange or brown and may come from metal or water. Use a tile-safe rust remover only after checking the label carefully. Mildew-like surface spots are often black, gray, pink, or orange and tend to appear where water remains.
Work on a small area with a soft tool. Colored grout deserves extra care because peroxide, bleach, and strong stain removers may lighten it.
When a mark remains unchanged after careful cleaning, the problem may be etching, worn glaze, failed sealer, or discoloration inside porous material rather than removable dirt. A tile or stone professional can identify the damage before further cleaning makes it worse.
The Best Way to Clean a Tile Shower with Mold
Small amounts of surface mold on hard tile can often be cleaned with detergent and water, followed by complete drying. The U.S. Environmental Protection Agency does not generally recommend routine bleach use for mold cleanup; remove visible growth and correct the moisture source. e the room, wear gloves, and use a cleaner compatible with the tile and grout. Scrub the hard surface gently, rinse if required, and dry.
Do not mix bleach with vinegar, ammonia, acids, or any other cleaner. EPA guidance specifically warns that chlorine bleach and ammonia-containing cleaners can create toxic fumes. t repeatedly returns around cracked caulk or loose grout may point to trapped moisture or a leak. Replace failed caulk only after cleaning, drying, and solving the water source.
Consider professional help when growth covers more than about 10 square feet, follows major water damage, appears to be behind the wall, or affects someone with significant health concerns. ing Shower Tiles with Vinegar and Baking Soda
Vinegar and baking soda foam when combined. The bubbling may help move loose debris, but the acid and base also neutralize each other quickly. The mixture may therefore be less useful than applying each product separately.
On vinegar-safe glazed ceramic or porcelain, you may first use diluted vinegar for mineral film, then rinse it away completely. If a compatible tile still has a stubborn mark, use a separate baking-soda-and-water paste later, rub gently, and rinse again.
Do not apply vinegar to marble, travertine, limestone, slate, or other acid-sensitive stone. Keep both products away from damaged or unsealed grout unless the manufacturer approves them.
Rinse more than once because dried baking soda can leave a white haze that looks like new mineral buildup.
How to Clean Grout Without Damaging It
Start with warm water and a pH-neutral grout cleaner. For compatible light cement grout, make a paste with baking soda and water. For organic stains, hydrogen peroxide may replace water after a hidden-area test.
Apply the paste directly to the grout and allow it to sit for about ten minutes without drying completely. Scrub along the grout line with a nylon grout brush or old toothbrush. Avoid wire brushes and sharp tools, which can cut, loosen, or permanently mark grout.
Rinse at least twice, changing the water when it becomes cloudy, and dry the joints.
Cleaning cannot repair damaged grout. Cracks, gaps, softness, crumbling areas, or grout pulling away from tile need repair rather than stronger scrubbing. If water soaks rapidly into sound cement grout, ask whether it should be resealed.
Epoxy and other modern grout types have different care needs, so follow the grout manufacturer’s instructions.
How to Clean Floor Tile Grout Without Scrubbing Heavily
Shower-floor grout collects residue because water and dirt settle there. First, remove hair and loose debris. Wet the floor with warm water, then apply a grout-safe cleaner directly to the lines. Allow the proper dwell time and keep the area wet enough for the cleaner to work.
Wipe with a microfiber pad and use a grout brush only where residue remains. Rinse the entire floor carefully so cleaner does not stay in low spots, then remove standing water with a squeegee or absorbent cloth.
Heavily stained, porous, or unsealed grout may not become evenly clean without some brushing. Dark areas may be stains, missing sealer, or hidden moisture.
Avoid flooding cracked joints, and arrange repairs if grout is loose or water appears to be entering the tile assembly.
Preventing Grime, Mold, and Water Spots Between Deep Cleans
Daily moisture removal is better than occasional harsh cleaning. After showering, squeegee the walls and glass, wipe water from ledges and corners, and leave the door or curtain open so air can move. Run the exhaust fan during the shower and afterward according to the fan manufacturer’s guidance.
Clean lightly each week before soap film becomes thick. Wash shower curtains, liners, mats, caddies, and bottles regularly because they can hold moisture and transfer residue back to clean tile.
Keep drain areas clear and fix dripping fixtures, cracked grout, loose tiles, and failed caulk promptly.
Recurring bathroom mold is strongly connected to ongoing moisture. EPA guidance notes that better ventilation and more frequent cleaning can help control shower mold that returns. usion: A Simple Routine for Cleaner Shower Tiles
The safest way to learn how to clean shower tiles is to begin with the material, not the stain. Ceramic, porcelain, glass, and natural stone do not all tolerate the same chemicals, so check the care instructions and test unfamiliar products before treating a large area.
For most showers, the reliable sequence is simple: soften the buildup with warm water, apply a compatible cleaner, give it time to work, scrub gently, rinse completely, and dry the surface. Treat grout with care, avoid mixing cleaning products, and investigate mold or stains that keep returning.
Regular drying and weekly cleaning protect tile, grout, and caulk. A gentle routine performed often is usually safer and more effective than waiting for heavy buildup and attacking it with harsh chemicals.
Frequently Asked Questions
What Is The Best Thing To Use To Clean Shower Tiles?
A pH-neutral tile cleaner is a safe general choice. Mild dish soap also works for light buildup. The best product depends on whether the tiles are ceramic, porcelain, glass, or natural stone.
Can I Use Vinegar To Clean Shower Tiles?
Diluted vinegar may be used on some glazed ceramic and porcelain tiles when the manufacturer permits it. Never use vinegar on marble, limestone, travertine, slate, or other acid-sensitive natural stone.
How Do I Clean Shower Tiles Without Heavy Scrubbing?
Soften the buildup with warm steam, apply a suitable cleaner, and allow enough contact time. Wipe with a microfiber sponge, rinse, and repeat gently instead of using harsh pressure or abrasive tools.
How Can I Remove Mold From Shower Tile Grout?
Apply a grout-safe cleaner, scrub with a nylon brush, rinse thoroughly, and dry the area. Recurring mold may indicate poor ventilation, damaged caulk, leaking fixtures, or moisture behind the tiles.
How Often Should Shower Tiles Be Cleaned?
Wipe or squeegee shower tiles after each use and perform a light cleaning weekly. A deeper clean may be needed every few weeks, depending on water hardness, ventilation, and shower use.
Enjoyed it? Find more exclusive content on The Styles Magazine.
Disclaimer: Always check the tile and cleaner manufacturer’s instructions and test products in a hidden area. Never mix cleaning chemicals. Seek professional advice for damaged surfaces, major mold growth, or possible hidden leaks.