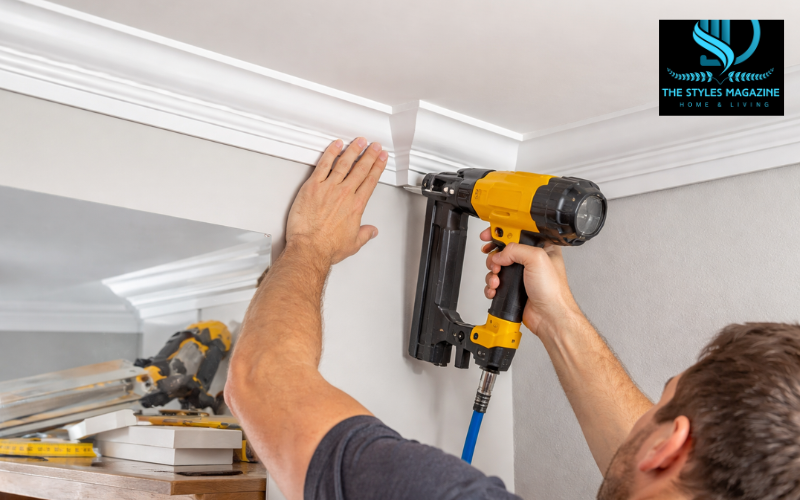
Crown molding is a decorative trim that sits where the wall meets the ceiling. It may look like a small detail, but it can completely change how a room feels. Adding crown molding makes a space look more polished, elegant, and complete. That’s why many homeowners choose to install it when upgrading their interiors.
If you’re wondering how to install crown molding, the process may seem difficult at first, but it becomes much easier once you understand the steps. It mainly involves measuring your space, cutting the molding at the correct angles, attaching it securely, and finishing it so everything looks smooth and clean.
This guide is designed to help beginners and DIY enthusiasts. While the process is beginner-friendly, it does require patience and attention to detail. With the right approach, you can achieve results that look just as good as professional work.
Quick Step-by-Step Guide (Easy Reference Table)
| Step | What to Do | Key Tip |
| 1 | Measure walls and mark lines | Keep lines level for straight results |
| 2 | Cut molding at correct angles | Always double-check measurements |
| 3 | Dry fit pieces | Test before nailing or gluing |
| 4 | Attach molding to wall/ceiling | Secure into studs for strength |
| 5 | Fix corners carefully | Use coping or miter cuts |
| 6 | Fill, caulk, and paint | Smooth finish makes it look professional |
What Crown Molding Is and Where It Works Best
Crown molding is a type of trim used to cover the joint between walls and ceilings. It comes in different styles, sizes, and materials, allowing you to match it with both modern and traditional interiors. Some designs are simple and clean, while others are more detailed and decorative.
You will most commonly see crown molding installed along ceilings, but it can also be used on walls and even on cabinets. In living rooms and bedrooms, it adds a refined look by softening the transition between the ceiling and the wall. In kitchens, it is often installed on top of cabinets to create a finished and custom-built appearance.
There are many options available in stores, including products often referred to as home depot crown molding, which come in materials like wood, MDF, and lightweight polyurethane. Each option has its own benefits, but all serve the same purpose—enhancing the look of a room while hiding uneven edges.
Tools and Materials You Need Before Starting
Before you begin learning how to install crown molding, it is important to gather all the tools and materials you will need. Having everything ready will save time and help you work more smoothly.
You will need tools such as a miter saw for cutting angles, a coping saw for shaping corners, and a level to ensure straight lines. A measuring tape is essential for accuracy, and a pencil will help you mark placement lines. A nail gun can make installation faster, but it is not required if you plan to work manually.
In terms of materials, you will need the crown molding itself, adhesive or wood glue, finishing nails, and paintable caulk. Wood filler or putty is also useful for covering nail holes after installation.
Optional tools like a stud finder and angle finder can make your work easier. A stud finder helps you locate strong points in the wall for secure attachment, while an angle finder helps you deal with corners that are not perfectly square.
Preparing Your Space for Crown Molding Installation
Preparation is one of the most important steps when installing crown molding. A well-prepared space leads to cleaner cuts and better results.
Start by measuring the length of each wall where the molding will be installed. This helps you determine how much material you need and where joints will be placed. After that, mark a reference line around the room to guide the placement of the molding. This ensures that everything stays straight and level.
Next, locate the studs in the walls and the joists in the ceiling. These points provide strong support for fastening the molding. Mark their positions lightly so you can easily find them later during installation.
Finally, check the angles of your room’s corners. Many walls are not perfectly square, which can affect how your cuts fit together. Taking a moment to check and adjust for these variations will save you from gaps and misalignment later.
How to Cut Crown Molding Accurately
Learning how to cut crown molding correctly is one of the most important parts of the process. Even a small mistake in cutting can lead to gaps that are difficult to fix.
Crown molding is usually cut using a miter saw. What makes it unique is that it is often cut upside down and backwards. This means the part that will touch the ceiling rests on the saw’s base, while the wall side leans against the fence. This positioning helps you match the angles correctly during installation.
When cutting, you need to understand that corners require specific angles. For most standard corners, cuts are made at 45 degrees, but this can change if the corner is not perfectly square. Taking the time to measure accurately will improve your results.
One common mistake is rushing through cuts without double-checking measurements. Another is placing the molding incorrectly on the saw, which leads to reversed angles. Careful setup and slow, steady cutting will help you avoid these issues.
Installing Crown Molding on Walls and Ceilings
Once your pieces are cut, the next step is installing them in place. This is where your preparation and cutting accuracy come together.
To understand how to install crown molding on ceiling areas, begin by positioning the molding along your reference line. Make sure it sits evenly between the wall and ceiling. If you are installing crown molding on a wall section, the same principle applies—keep it aligned and level throughout.
Start by dry fitting each piece before attaching it. This means placing it in position without glue or nails to check if it fits properly. If adjustments are needed, make them before moving forward.
When you are satisfied with the fit, apply adhesive along the edges and secure the molding using nails. Aim for the studs and joists you marked earlier, as these provide the strongest hold. Proper alignment and steady placement will ensure a clean and professional look.
How to Install Crown Molding Corners Perfectly
Corners are often the most challenging part of crown molding installation, but with the right method, they can look seamless.
There are two main types of corners: inside and outside. Inside corners are where two walls meet inward, while outside corners extend outward. Each requires a different approach.
For inside corners, many professionals prefer a coping method. This involves cutting one piece straight and shaping the second piece to fit against it. This technique creates a tighter joint and hides small imperfections.
For outside corners, miter cuts are commonly used. Both pieces are cut at matching angles so they meet neatly at the corner. Understanding how to install crown molding inside corners and outside corners correctly will make a big difference in the final appearance.
Taking your time and testing each corner before attaching it will help you achieve clean and tight joints.
Attaching Crown Molding Securely Without Gaps
Proper attachment is key to making your crown molding look professional. Knowing how to attach crown molding to ceiling surfaces correctly ensures it stays in place and looks smooth.
Using both nails and adhesive is often the best approach. The adhesive helps create a strong bond, while the nails hold the molding in position as the glue dries.
If you do not have a nail gun, you can still complete the job. Understanding how to install crown molding without nail gun tools simply means using a hammer and finishing nails. It may take more time, but the results can still be excellent with careful work.
Sometimes the molding may not sit perfectly against the wall or ceiling. In this case, you can slightly adjust its position, a technique often called seating, before securing it. This helps reduce visible gaps and improves the overall finish.
Installing Crown Molding on Cabinets for a Finished Look
Crown molding is not limited to ceilings. It is also widely used on cabinets to give them a custom, high-end appearance.
When learning how to install crown molding on cabinets, the main goal is to create a smooth transition between the cabinet and the ceiling. This often requires adding support pieces on top of the cabinet to hold the molding in place.
Kitchen cabinets may require extra attention because they are often not perfectly level. Careful measurement and alignment are essential to ensure the molding fits properly.
By adding crown molding to cabinets, you can transform a simple kitchen into a more stylish and complete space.
Joining Long Pieces with Clean Scarf Joints
In larger rooms, a single piece of molding may not be long enough to cover the entire wall. This is where scarf joints are used.
A scarf joint connects two pieces of molding with angled cuts, usually around 45 degrees. This creates an overlapping joint that looks more natural and less noticeable than a straight connection.
The best place to create a scarf joint is over a stud. This allows both pieces to be securely fastened, reducing the chance of movement or separation over time.
Properly made scarf joints help maintain a smooth and continuous appearance across long walls.
Finishing Crown Molding for a Smooth Professional Result
After installation, finishing touches are what make the molding look complete.
Start by filling all nail holes with wood filler or putty. Once it dries, lightly sand the surface to make it smooth. This step ensures that the final paint or stain will look even.
Next, apply caulk along the edges where the molding meets the wall and ceiling. This helps hide small gaps and creates a seamless transition.
Finally, apply paint or stain to match your room’s design. Taking your time with finishing will give your crown molding a clean and polished appearance.
Common Mistakes to Avoid When Installing Crown Molding
Even small mistakes can affect the final result, so it is important to be aware of common issues.
Incorrect angle cuts can lead to visible gaps, especially in corners. Poor measurements can cause pieces to be too short or misaligned. Skipping dry fitting can result in unexpected problems during installation.
Another common mistake is rushing through the process. Crown molding requires patience, and taking shortcuts often leads to uneven results. Working carefully and checking each step will help you avoid these problems.
Beginner Tips to Make Installation Easier and More Accurate
If you are new to crown molding, a few simple tips can make the process much easier.
Start with a small room or a simple project to build your confidence. Practice cutting on scrap pieces before working on your final material. This helps you understand how angles work.
Many people also learn by watching tutorials or following methods similar to “how to install crown molding this old house” style guides. These resources show real-world techniques that are easy to follow.
Taking your time, double-checking measurements, and staying patient will greatly improve your results.
Conclusion
Installing crown molding may seem challenging at first, but once you understand the process, it becomes much more manageable. From measuring and cutting to installing and finishing, each step plays an important role in achieving a clean and professional look.
If you follow the correct techniques and work carefully, you can transform your space with crown molding that looks polished and well-crafted. Remember that patience and precision are key.
By learning how to install crown molding the right way, you not only improve your home’s appearance but also gain a valuable DIY skill that you can use in future projects.
FAQs
Is Crown Molding Hard To Install For Beginners?
Crown molding is beginner-friendly but requires patience and accuracy. With proper measuring, careful cutting, and practice, even first-time DIYers can achieve clean and professional-looking results.
Do I Need A Nail Gun To Install Crown Molding?
No, you can install crown molding without a nail gun. A hammer and finishing nails work fine, but a nail gun makes the process faster and more precise.
What Is The Hardest Part Of Installing Crown Molding?
Cutting and fitting corners is usually the hardest part. Inside corners especially require careful cutting techniques like coping to achieve a tight and seamless joint.
Can I Install Crown Molding On Cabinets?
Yes, crown molding can be installed on cabinets to create a custom and finished look. You may need support pieces on top of cabinets for proper alignment and attachment.
Why Are There Gaps After Installing Crown Molding?
Gaps often happen due to uneven walls, incorrect angle cuts, or poor measurements. Using caulk and proper fitting techniques can help fix small gaps and improve the final look.
Enjoyed it? Find more exclusive content on The Styles Magazine.
Disclaimer: This content is for informational purposes only. Results may vary based on tools, materials, and skill level. Always follow safety guidelines and consider professional help for complex installations.